
The read-aloud function of Eye-Able Assist offers several ways to have a website read aloud and can be customised for your own website.
How the read-aloud function works
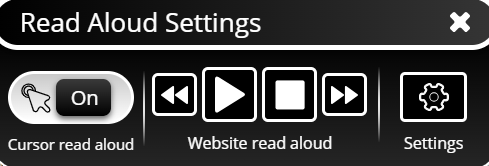
The “Read website aloud” function in Eye-Able Assist supports several options for how the page can be read aloud:
- Using the play button, the entire page can be read aloud starting from the first heading. With the forward and back buttons (and the left and right arrow keys on the keyboard), elements can be skipped.
- Just like in tab navigation, elements can be specifically navigated to and read aloud using keyboard shortcuts, for example H for headings. The available shortcuts are listed in the guide, which can be opened via the keyboard with Alt + F2.
- Using the Read mouse pointer aloud function, individual elements can also be read aloud by hovering over them with the mouse pointer. This is particularly helpful for people who only want to have a small section of the page read aloud.
Recognised elements
The read-aloud function and the tab navigation of Eye-Able Assist recognise the following elements of the page:
- Headings
- Images
- Tables
- Lists and list items
- Input fields
- Buttons
- Forms
- Selection lists
- Embedded elements (iFrame, audio, video)
- Links
- Unlinked text
The available elements and their keyboard shortcuts are based on the NVDA screen reader.
Optimising the automatic read-aloud function
You can adjust the reading flow of the automatic read-aloud function in the Assist configurator in the Eye-Able dashboard under “Read-aloud function”.

The following settings are available in the “Customisation of the automatic read-aloud function” section:
- Start element: determines the first element read aloud. By default, the h1 heading is selected as the first element.
- Allowlist: runs the read-aloud function only in selected blocks of the page.
- Blocklist: excludes elements from automatic reading aloud.
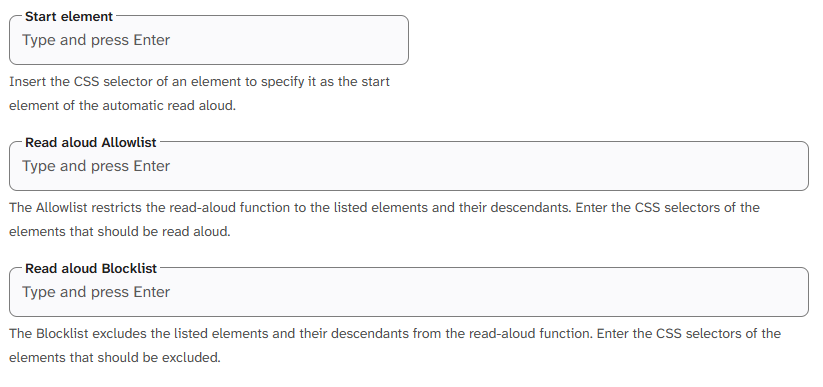
To define rules and exceptions for the elements of the website, the corresponding CSS selectors, for example #elementID, .importantElements or [role="tooltip"], can be added to the fields and each confirmed with the Enter key. These rules allow you to guide the automatic reading flow and adapt it individually to subpages.
Alternatively, you can also set the rules directly in the code of your website using the following CSS classes:
- Define the first element read aloud:
eyeAble_SrStart - Run the read-aloud function only in selected blocks of the page:
eyeAble_SrText - Exclude elements from automatic reading aloud:
eyeAble_SrSkip
Setting the pronunciation
In the Assist configurator, you can also use “Pronunciation settings” to determine how the read-aloud function pronounces certain terms. To do this, enter the abbreviation and the text with the desired changes. If, for example, you want an abbreviation to be read as individual letters rather than as one word, enter the abbreviation with spaces between the letters: “CEO”: “C E O”.
You can use this setting not only for abbreviations. It also helps with terms that the read-aloud function does not know, for example proper names, or when a word is not stressed as desired. In this case, you can influence the pronunciation with specifically placed spaces or an alternative spelling of the word.
You can find more about the behaviour of the read-aloud function with abbreviations and characters in this article:
Further information and help
You can find more information on related topics in the following articles:
- Adjusting the reading speed in Eye-Able Assist
- Read-aloud function in Eye-Able Assist not working
- Why does the read-aloud function of Assist not read ARIA descriptions?
- Data transfer with the read-aloud function of Eye-Able Assist
- Eye-Able Assist and screen readers
Do you have further questions or need personal support? In the following article, you can find out how to get in touch with us: