
In this guide, you'll learn how to integrate Eye-Able Assist, Plain Language, Translate, and Access into the header of your WordPress site using JavaScript code to improve accessibility on your website.
Prerequisites
To integrate this, you'll need a WordPress plugin that allows you to insert code into the header or footer section.
Step-by-step instructions
Step 1: Add Plugin
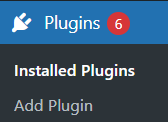
Go to the "Plugins" menu in the WordPress dashboard and click on "Add New Plugin."
Step 2: Install Plugin
Looking for a plugin that allows you to insert code into the header or footer. In this example, the “Insert Headers And Footers” plugin is used.
-
Select the plugin and click on "Install."
-
Wait until the installation is complete. Then, click on "Activate."
Step 3: Open the Plugin Settings
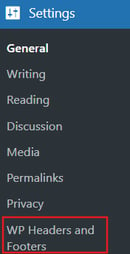
Go to the main menu, select "Settings," and choose your installed plugin, for example "WP Headers and Footers".
Step 4: Insert Eye-Able Code
In the "Scripts in Header" field, insert the provided Eye-Able code.
Note:
-
You can find the installation code in your Eye-Able Dashboard under the "Installation" submenu for the desired product. For example, for Assist, Plain Language, Translate and Access.
- For Plain Language and Translate, you only need to include the script once, since both modules use the same script.
Click on "Save Changes" to complete the integration.
More information
You can find more information in how to integrate Eye-Able software in your WordPress website, in the following article:
How can I integrate Eye-Able software into my WordPress website?